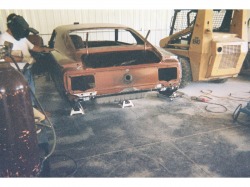
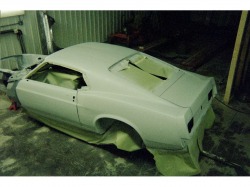
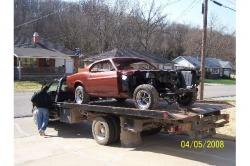
Phase #1
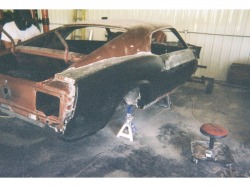
Here the body was dissasembled and put on rotisserie at MuscleCrafters Bodyshop to determine what the car needed which was new doors,trunk floor & lid, rear frame rails & quarters, replace battery apron and repair other 3 aprons. Also later it was suggested we replace rear & front valances. We are adding a Shaker Assembly to motor so a new hood was included.
Rear Quarters Removed
With quarters removed it was advised by Paul the owner of MuscleCrafters to replace both outer wheelwells which we agreed to.
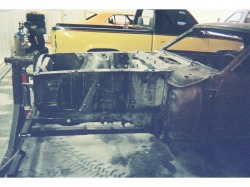
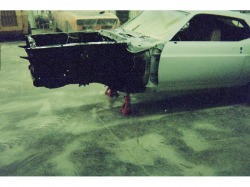
New Quarters & Doors
Here you can see where they have installed the rear quarters and doors and the new outer wheelwell is in place.
Rear Quarters #2
Here Paul is finishing up putting the driversside quarter & outer wheelwell on.
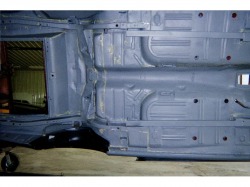
Floors
Paul determined the floors were fine except the driversside had been replaced at some time and it had only been spot welded so he welded it completely all around. You can also see where we had him weld in frame connectors, this is a must on unibody cars to make them more rigid like a full frame car.
Fender Aprons
Here you can see where the inner fender aprons have been repaired and waiting for paint.
Into The Paint Booth
The car is wheeled into the paint booth to begin the process of sanding & taping to get ready for primer & paint.
Primer
Here the car has been cleaned,taped and a couple coats of primer sprayed.
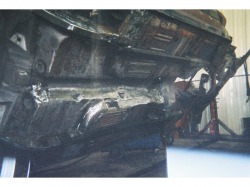
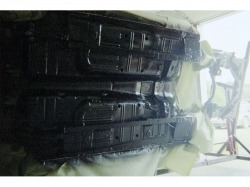
Undercarriage
Here you can see where Paul has primed the undercarriage of the Mach1.
Undercarriage Painted
Paul has painted the undercarriage with a corrosion resistant Paint.
Fender Aprons
Here the inner fender aprons have been painted a semi-gloss.
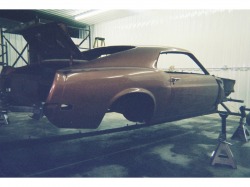
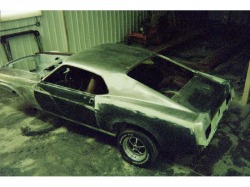
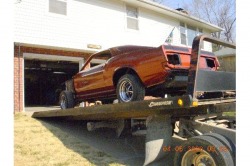
Mach1 Returns Home
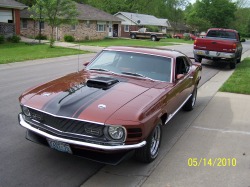
Mach1 has been painted it's original color Chestnut Metallic ( Y Code ) 1 of 143 painted in this color for 1970. Paul is preparing to unload it into my garage for us to reassemble. The front fenders and hood will be installed after drivetrain & interior are complete to reduce the risk of scratching new paint.
Coming Home
Here Paul is unloading the Mach1 into our garage for reassembly.
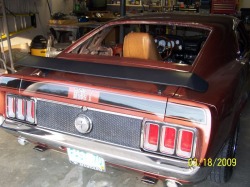
Taillight Section
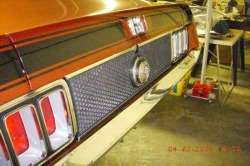
Taillights, New chrome bezels, Honey Comb panel with trim, Flip open gas cap, Rear Bumper and Mach1 letters installed.
Doors
Install door handles, Latches, rocker molding and mirrors. Used threaded rivets to attach mirrors rather than sheet metal screws.
Tank Armor
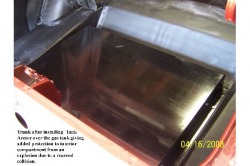
Install Tank Armor over gas tank as a safety measure in case of rear end collision.
Rear Spoiler Installed
Finally after finding out the one that came on the car was not correct and after wasting time and money bidding on 2 from ebay that stated they were originals or repos made to OEM specs then having to return them with a loss on return shipping I found an original in Florida from a company that deals only in OEM mustang parts ( MustangMasters ). It cost us thru the nose but it was less of a hassle and the company was very helpful and backed up their parts with a 30 day return policy if not satisfied.
Spoiler Support Brackets
These brackets are designed to support the spoiler when bolted to the trunk lid, otherwise the weight of the spoiler will cause the trunk lid to deform when bolted tight, these bolt to the spoiler & the trunk hinge. These brackets are usually missing on most Mustangs with spoilers. You must have a Ford OEM spoiler with a 36 inch measurement center to center on the pedestal studs to use these brackets.
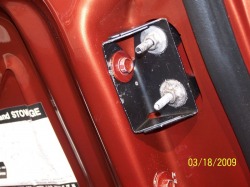
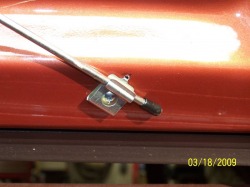
Spoiler Prop Rod

Here is the spoiler prop rod installed, The weight of an original Ford spoiler is about 20 lbs. so when the spoiler is bolted on the trunk lid does not want to stay open. These too are missing on most Mustangs with a rear spoiler. You can buy these from most Mustang parts companies but no one has any idea how they are mounted and even in the Ford Shop Manual there is no diagram showing these. It was most likely a dealer installed item. After careful measuring this was the best location I could come up with and make it work.
Prop Rod In Use
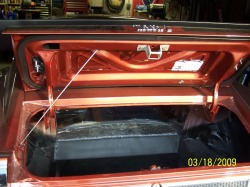
Here you can see how the prop rod is used to hold up the trunk lid. I drilled a 9/32 hole at the back of the brace that the trunk lid catch is bolted to so I could mount the attachting hardware that holds the prop rod to the trunk lid. Now before I installed prop rod I cut off the angle end towards the end that rests on the body of the car then put a rubber vacumn cap to protect the paint when in use.
Prop Rod Holder
Here you can see how I cut the end off the prop rod and installed a rubber vacumn cap to protect paint. I located the catch that holds thr prop rod out of the way when not in use on the rear brace of trunk lid. I drilled a 9/64 hole to accept the little tab on the top of the catch then I drilled another 9/64 hole to attach the screw to hold the catch in place. With no diagrams or seeing a car with a prop rod installed this is the best I could come up with and it works for me.
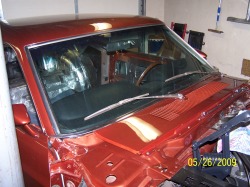
Windshield Installed
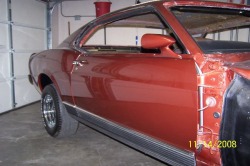
FINISHED #1
FINISHED #@
FINISHED #3
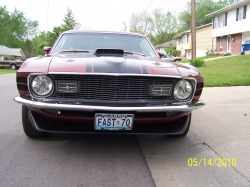
FINISHED #4
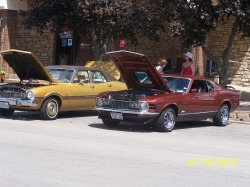
First Car Cruise